Content types
Before you can start writing content, you need to define at least one content type. Content types serve as templates for content items so that each item has a predefined structure.
- Learn how to design a suitable content model for your organization with our introduction to content modeling.
- Familiarize yourself with the terminology, tools, prerequisites, and principles before you start content modeling.
- Uncover the ins and outs when you create your first content model.
Create content types
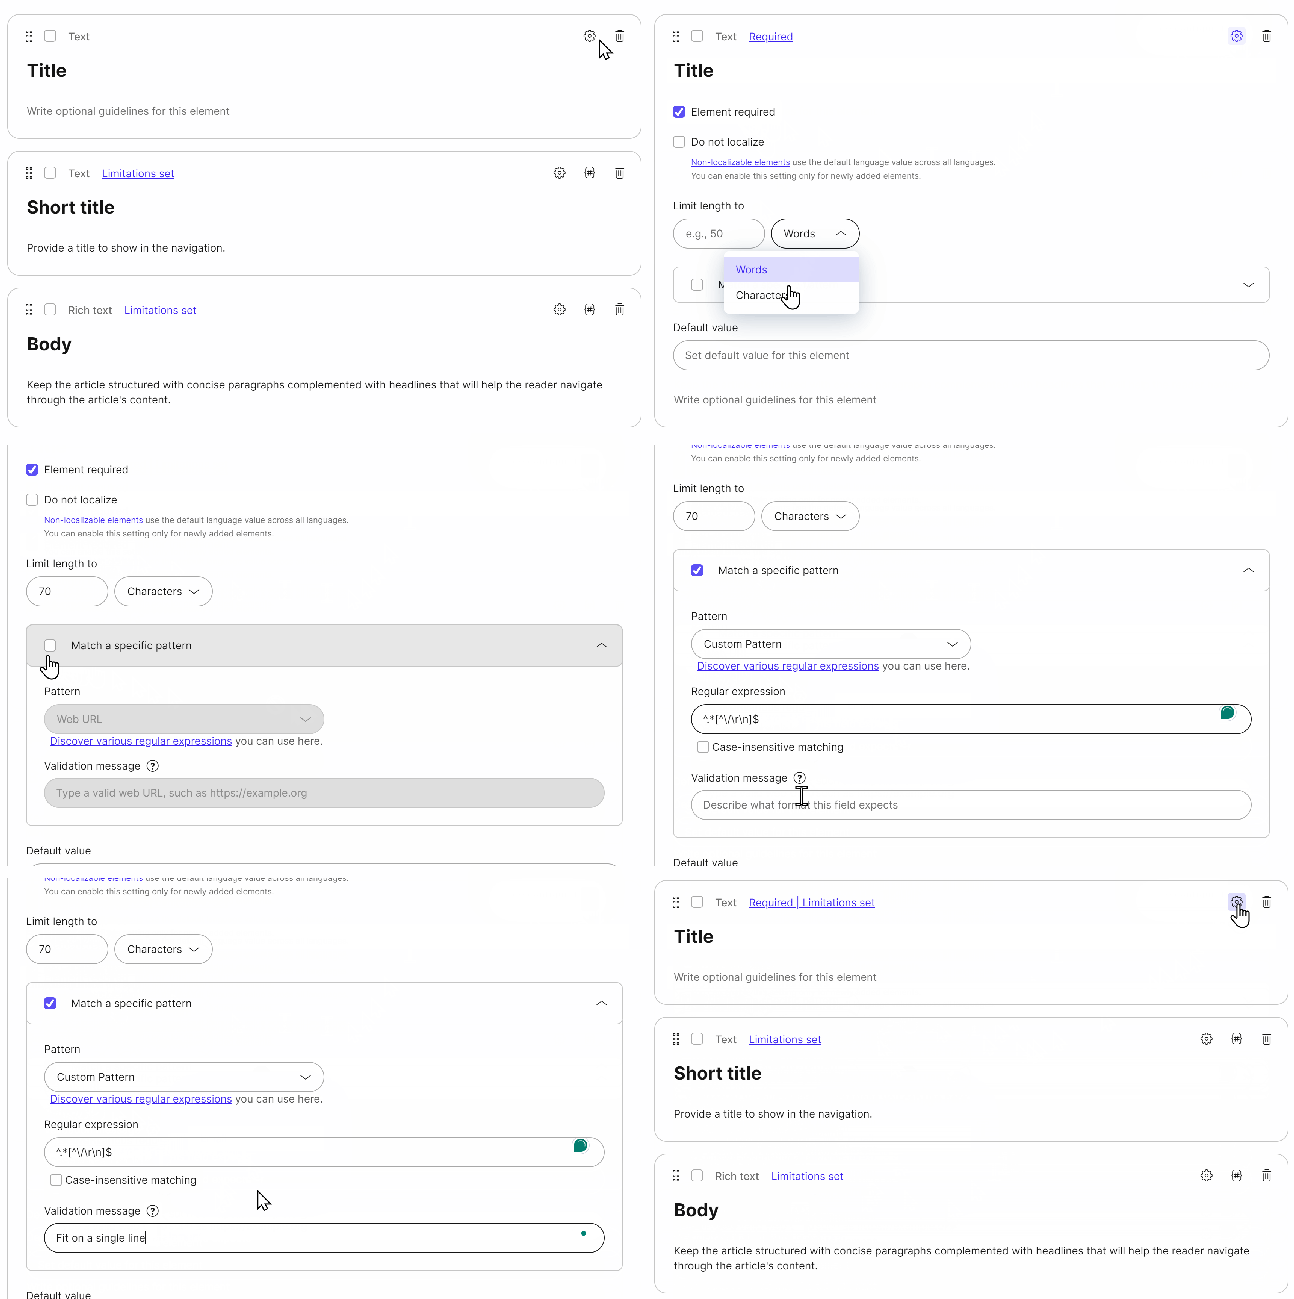
Content types consist of content elements, which you can mix and match to create the content model you want.- In
Content model, click Create new.
- Type a name in Content type name.
- Drag (or click) content elements as needed.
- Tip: Use the
button to specify element limitations and default value, and choose if the element is required or non-localizable.
- Tip: Use the
- (Optional) Add content groups to organize elements in tabs with a dedicated template for content creators.
- Click Save changes.
Duplicate content types
If you want to create a modified version of a content type, open the content type and click Duplicate in the top right. This creates a duplicate of your content type named “Type_name (copy)” in the project.Set elements as required
By default, each element you add is optional. If you set the element as required, content creators will know which elements they need to fill in when working with content items.
Set default value for elements
If you have an element with a part of the content that repeats a lot (like
https:// in URLs), set a default value for the element.When you create a new content item, the element gets pre-filled with the default value, and you can adjust it if needed.
You can set default values for the asset, custom element, date & time, linked items, multiple choice, number, subpages, taxonomy, and text elements.
Remember, if an element repeats with content as a whole, convert it to a content item and reuse it like that.Non-localizable elements
By default, all elements are localizable. This means they can have different values in each language. If you want an element to have the same value across all languages, mark the element as non-localizable. If you change your mind later, you can convert the element back into a localizable one.Limitations for non-localizable elements
- Only newly added elements can be marked as non-localizable.
- Rich text elements cannot be marked as non-localizable.
Remove elements
You can remove any element from a content type at any time, even when a content item uses the content type.Edit codenames
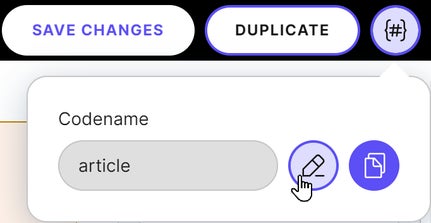
Codenames identify objects such as content types or items. When you save an object for the first time, its codename is generated from its name. For example, a content type named My article gets the codenamemy_article. Renaming the object doesn’t affect its codename unless you edit the codename yourself.
To edit codenames, look for the 
Rules for codenames
When editing codenames, the new codenames must meet the following conditions:
- Only lowercase letters, numbers, and underscores are permitted.
- Codenames must start with a letter or an underscore and have at least one character.
- Codenames are usually limited to 60 characters, but longer codenames are allowed for multiple choice options and taxonomy terms.
- Codenames of elements within a snippet must be prefixed with the snippet's codename.
- Codenames must be unique per object type. This applies to, for example, every element within a content type, every content type within an environment, every content item within an environment, and so on.
- All letters are made lowercase.
- All forbidden characters are replaced by
_. - For any names that start with a number, the codename will start with
n. - Codenames that duplicate another codename will have a random string attached to the end.
- Codenames of elements within a snippet will be prefixed with the snippet's codename.
- Codenames will be cut off at the character limit.
Delete content types
If you want to delete a content type that is already used for any components or content items, you need to delete the content items first. To delete a content type:- In
Content model, use the checkboxes to select the content types you want to delete.
- Click Delete.
Limit role access to elements
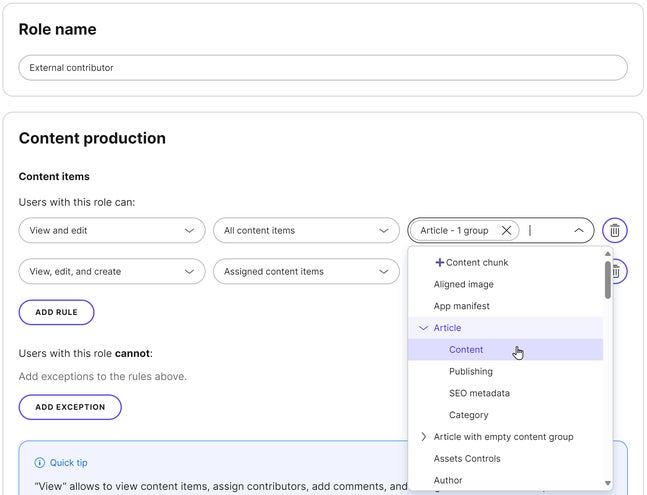
When you have multiple contributors accessing your content items, it’s best to limit their access to specific elements by using content groups based on their roles. For example, in an article content type, a content creator can access only the content body, while an SEO specialist can access the metadata settings. To set role-based limitations:- In
Environment settings, go to Roles.
- Click an existing role.
- Select content types and their content groups.
- Click Save changes.
